When developing software, you most probably will need to make use of some form or another of iterative logic. Like most languages, C# offers a number of looping constructs each of which can have different uses.
The for Loop
This loop structure tends to be used when you know how many times you want to iterate, and it is also preferred if you want to keep a counter or an iterator.
The for loop is made out of three parts:
for(<initializer>; <boolean expression>; <iterator>) { <your code> }
The initializer is where you can declare and initialize a counter variable. This part of the loop is executed before the actual loop iterations, so it is a one time execution.
The boolean expression is a boolean value which is checked on each loop iteration. The loop will keep executing as long as the boolean expression results to true. When this value becomes false the loop will terminate.
The iterator usually consists of a counter being incremented or decremented. This is done on each loop iteration.
[continue reading…]
Quite often you would need to append two strings or maybe more together. There are multiple ways to do this in C# – we’re going to look at appending strings by just concatenating them, or by making use of the C# StringBuilder class.
String Concatenation
In the .NET Framework this method of appending strings can be very costly on system resources. This is because the string class is immutable, which means that the string itself is never changed when another string is concatenated to it. The .NET Framework will write the new concatenated string to a different memory location while the old string is also in memory. Then when finished creating the new string, the old string will be deleted. This process can be very time consuming when concatenating very large strings.
The StringBuilder Class
Using this class is the recommended way of concatenating strings with the .NET Framework. The System.Text.StringBuilder class has an Append() method which can be used to add text to the end of the existing text in the StringBuilder.
[continue reading…]
The whole concept behind a message box is to display text to the user or to ask a question of some sort. So in practice we can use message boxes to display an error to the user, or maybe to ask the user to confirm something before continuing. A C# MessageBox is a read-only dialog box which means that the text displayed in the MessageBox cannot be edited by the end user.
With C#.NET it is very easy to display a message box. The following line of code will display the simplest form of message box available.
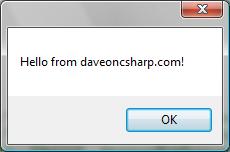
MessageBox.Show("Hello from daveoncsharp.com!");
MessageBox is the C# message box class which is part of the System.Windows.Forms namespace and Show() is the static method we must call in order to display the message box on screen. When we execute the code we would be shown a dialog which looks like the following when running under Microsoft Windows Vista:

Adding a Caption
A message box caption is the text which is displayed in the title bar of the message box. To add a caption to our message box we have to pass the text we want to display as another parameter in the Show() method. In this example we are going to write “Welcome” in the caption.
MessageBox.Show("Hello from daveoncsharp.com!", "Welcome");
[continue reading…]
Since this is my first actual post, I thought I should start at the very beginning – with a traditional ‘Hello World’ example.
During these examples I am going to be using Microsoft Visual Studio 2008 to write and compile my C# code. If you do not have Visual Studio installed on your pc, you can download the Microsoft Visual Studio Express Editions from here.
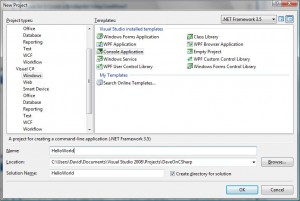
Once installed, open Visual Studio and click on the File menu. Select New > Project and you will see a screen similar to the one below.

Click for full size image.
From this screen you can create many different types of new Visual Studio Projects. For this example though, we need to select a ‘Visual C# Windows’ project type from the left window and from the right window we need to select the ‘Console Application’ template. Then enter a project name and for this example we are using ‘HelloWorld’, and finally click on the ‘OK’ button.
You will now end up with some automatically generated code which looks like this:
using System;
using System.Collections.Generic;
using System.Linq;
using System.Text;

namespace HelloWorld
{
    class Program
    {
        static void Main(string[] args)
        {
        }
    }
}
[continue reading…]
Why start a blog they asked me… well I’ll answer that in a second.
First it’s best I introduce myself. My name is David Azzopardi and I live on the small Mediterranean island of Malta. I am currently employed as a software developer with a company specializing in building network security, content security and messaging software. I have been working in the software business for around eight years now and I have learned a thing or two through my experiences.
I decided to create this blog to help individuals who are learning the art of software development, and especially those who are learning to program in C#.NET.
Through this blog I will be showing examples of different scenarios using C# code, I will be providing short tutorials on how to create stuff using C#.NET, and I will also be answering common programming questions.
If you are a student learning C# or maybe you just want to learn C# for the fun of it, take note of this url and check out my blog often because I’m sure you will find some code snippets or maybe a tutorial which will help get you started. Also, please feel free to contribute to any of the blog posts by leaving your comments.
Stay tuned to this blog for more info!
Dave


